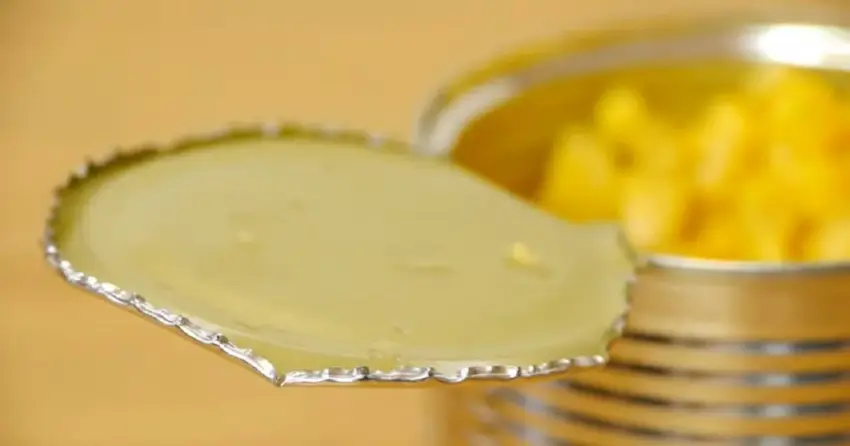
We have all stood over the kitchen counter staring down at a sealed tin of sweet corn or black beans, only to realize the can opener went missing during the last move. Maybe you packed camp supplies in a hurry and left the gadget sitting in the utensil drawer back home. The sink is full, dinner is waiting, and that little metal cylinder might as well be a locked vault.
Do not chuck the can back into the pantry just yet. Knowing how to open a can without a can opener is one of those timeless, practical skills that turns an irritating hiccup into a quick victory. You do not need heavy machinery or dangerous power tools to pull it off. A heavy spoon, an everyday kitchen blade, or even a flat piece of sidewalk will do the trick.
Before grabbing the nearest sharp object, understanding how modern tin cans work makes the entire process ten times easier. Cans are not solid blocks of iron. Manufacturers take a cylindrical body, drop a flat lid on top, and roll the two edges together under high pressure. This creates a raised, folded lip known as a double seam. Your goal is simply to break that thin inner fold or wear down the outer crimp.
The Spoon Method: Friction Over Brute Force
If you have access to standard cutlery, the spoon method is by far the safest and most reliable technique. It sounds absurd until you watch it happen. You are not trying to spear the metal like an arrow. Instead, you are using the rigid curve of stainless steel to create intense friction against the soft tinplate, thinning the metal until it gives way.
Skip delicate silver-plated teaspoons or flimsy cafeteria flatware for this job. You want a heavy, solid stainless steel soup spoon or tablespoon that will not bend under palm pressure. Place your can on a flat, slip-resistant surface like a wooden cutting board or a damp dish towel.
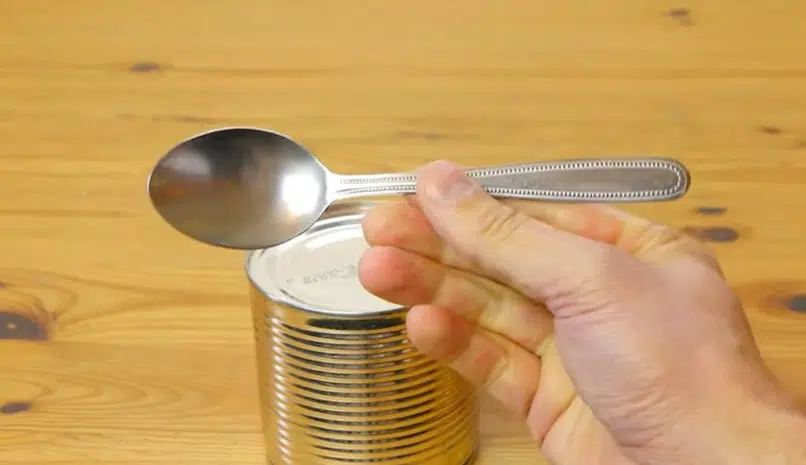
A sturdy stainless steel tablespoon positioned flat against the inner rim creates the exact leverage needed to start piercing the metal.
Grip the bowl of the spoon firmly in your dominant hand, wrapping your fingers close to the rounded head so only a half-inch of the tip peeks out beneath your thumb. This close grip stops the handle from flexing. Rest the bottom edge of the spoon tip right into the deep groove along the inside of the can’s raised rim.
Press down with firm, steady body weight and start rubbing the spoon tip back and forth over a tiny quarter-inch patch of that groove. Keep your strokes short and deliberate. Within fifteen to twenty seconds of vigorous rubbing, the friction will grind through the thin metal plate. You will hear a soft hiss as the vacuum seal breaks, followed by a tiny puncture hole appearing beneath your spoon.
Prying the Lid Without Splitting the Rim
Once that first hole appears, resist the urge to wedge your fingers into the gap. That newly torn tin is sharp enough to slice skin instantly. Instead, slide the edge of your spoon into the puncture and begin working your way around the circumference, pressing downward and rocking the bowl to expand the opening.
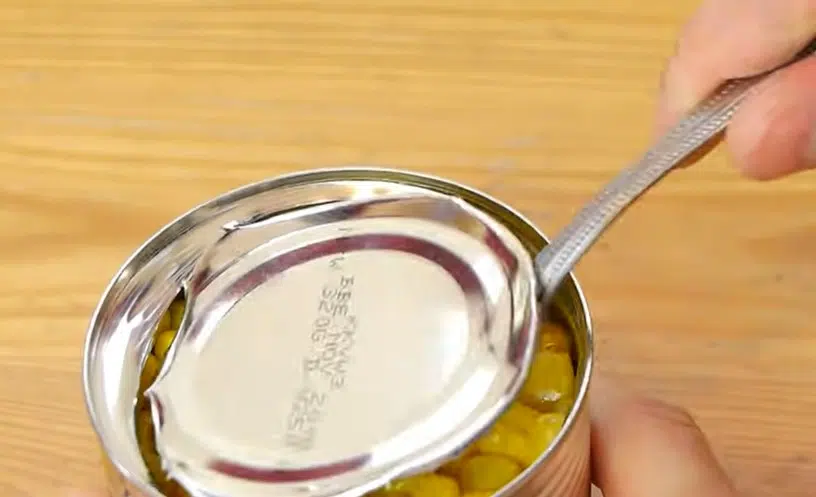
Once the seam gives way, slip the spoon handle into the opening to pry the jagged lid back without touching raw edges.
Work your way around roughly two-thirds of the rim. You do not need to detach the lid entirely; leaving a small metal hinge makes handling much safer. Slide the handle of your spoon under the loosened edge, brace your thumb against the outer side of the can, and lever the lid upward until you have clear access to the food inside.
Keep a damp cloth nearby. Puncturing pressurized cans of stewed tomatoes or beans can spit tiny droplets of brine the moment the vacuum seal pops.
The Chef’s Knife Technique: Working from the Heel
When you need to get inside a can quickly and do not mind taking extra care, a heavy chef’s knife or santoku gets the job done in seconds. However, form matters tremendously here. Hacking down at the lid with the pointed tip of a knife is an easy way to snap high-carbon steel, dull your blade, or send the tip skidding across the metal directly toward your fingers.
Never use your high-end paring knives, bread knives, or flexible boning blades for this task. Reach for a sturdy, thick-spined chef’s knife that you use for standard prep work. The secret lies in using the wide, durable heel of the blade right next to the handle bolster, where the steel is thickest and your leverage is greatest.
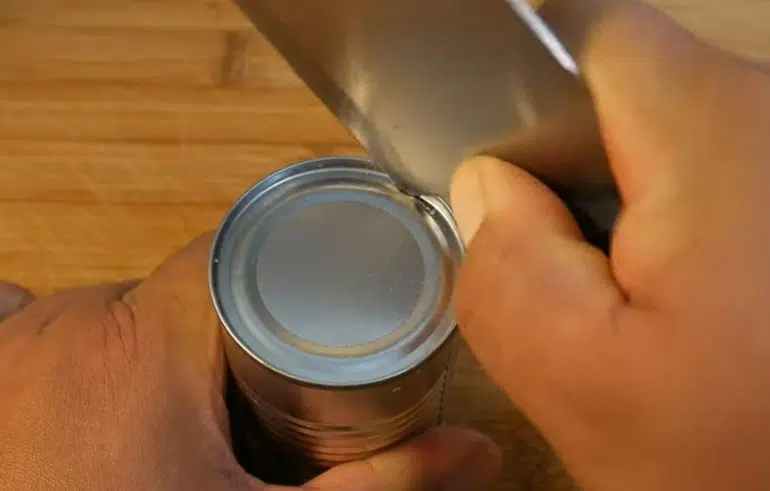
Resting the knife heel in the inner seam groove provides steady downward control while protecting the delicate tip of your blade.
Set the can squarely on your cutting board. Hold the knife handle firmly, placing the blade heel directly against the inner rim of the lid. Keep the blade pointed safely away from your body, angled slightly outward. Press down with firm, controlled pressure until the heel bites through the lid with a satisfying crunch.
Once the first puncture is established, do not drag or saw the blade. That ruins your cutting edge. Instead, lift the blade heel slightly, set it into the next adjacent spot on the rim, and press down again. Repeat this motion around the perimeter like a manual punch puncher. After completing half the circle, pry the lid up using the flat side of the knife blade.
The Concrete Friction Grind: Zero Tools Required
Suppose you are out on a trailhead, tailgating at a game, or unpacking your very first apartment without a single utensil in sight. All you need is rough stone or outdoor pavement. This method feels like pure survival ingenuity, but it relies on simple workshop physics: grinding down the top crimp until the lid drops loose on its own.
Find an unpolished concrete slab, a flat paving stone, or an unfinished cinder block. Smooth slate, polished quartz, and decorative brick are too slick to generate the rough grit needed to shave down tinplate. Make sure the surface is free of wet mud or loose gravel that could contaminate your meal.
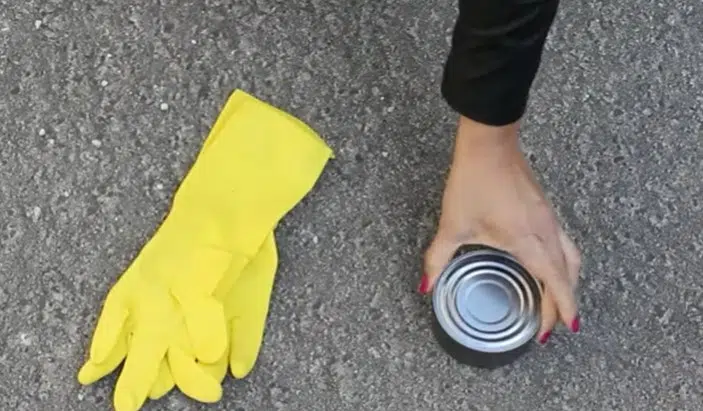
Inverting the can onto smooth pavement wears down the rolled double seam, loosening the lid through steady friction.
Flip the can upside down so the top rim rests flush against the concrete surface. Place the palm of your hand flat on the base of the can. If you have a pair of cleaning gloves or a thick shop rag, wear it to protect your palm from pressure abrasions. Rub the can in steady, circular patterns with firm, downward force.
Check your progress every thirty seconds. As the raised outer seam grinds down, you will start seeing dark metallic dust collecting on the stone. Soon after, tiny beads of liquid or moisture will begin seeping around the edge of the can. That moisture is your signal to stop grinding immediately. Continuing past this point will push stone dust directly into your food.
Flip the can right-side up and wipe the outer rim thoroughly with a clean rag or paper towel. Grip the sides of the cylinder with both hands and give the can a gentle, rhythmic squeeze. The crimped seam has been worn down to paper-thin foil, so that inward squeeze will pop the lid upward with ease.
Extracting Your Food and Sidestepping Metal Burrs
Getting the can open is only half the battle. Because these workarounds bend and tear metal rather than shearing it smoothly like an engineered cutting wheel, they leave behind jagged edges and microscopic tin burrs. Taking thirty seconds to finish the job cleanly keeps your meal safe and your hands intact.
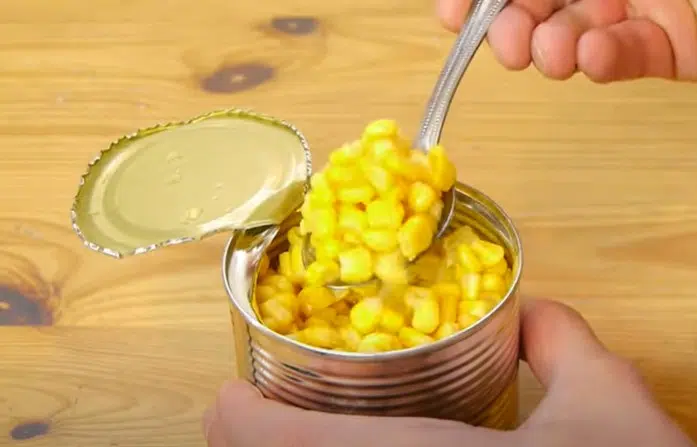
With the folded lid pulled safely back, you can scoop your ingredients out cleanly without catching sharp tin edges.
Always keep these food prep rules in mind before serving:
- Wipe before peeling: Run a damp paper towel around the outer crevice before prying the lid fully open. This sweeps away stray metal shavings or concrete dust before they can tumble into your ingredients.
- Never drink the canning liquid directly: If you opened a can of whole peaches, pineapple rings, or broth, pour the liquid through a fine wire mesh strainer rather than tipping the jagged can straight into a bowl.
- Use long utensils: Reach into the container with a deep serving spoon or tongs. Scraping your knuckles against rough, torn tin while digging for black beans at the bottom of the can is an unnecessary cut waiting to happen.
- Decant immediately: Never store half-used canned food inside a roughly opened metal tin in the refrigerator. Transfer whatever you do not eat straight into a glass container or airtight food container.
Two Garage Alternatives for Extreme Emergencies
If you find yourself stuck without kitchen tools but have access to a basic home toolbox, a few garage staples work just as well as standard kitchen utensils. These methods offer pinpoint control without dulling your cooking knives.
The Flathead Screwdriver and Mallet
A standard flathead screwdriver acts as a mini chisel. Place the flat tip against the inner groove of the can lid, hold the shaft steady, and tap the handle gently with a rubber mallet, hammer, or wooden block. Move the tip half an inch, tap again, and continue along the perimeter. This creates remarkably clean cuts with almost zero physical strain.
Needle-Nose Pliers
If you have pliers on hand, grip the raised outer lip of the can firmly between the jaws and twist your wrist outward. This bends and wrinkles the crimped double seam. Work your way around the rim, crimping and untucking the folded lip until the structural integrity breaks down and the center lid lifts free.
Smart Ways to Stay Prepared Next Time
Knowing how to open a can without a can opener saves dinner when plans go sideways, but keeping a backup in place brings genuine peace of mind. Tucking an inexpensive military P-38 can opener on your keychain or stashing a spare manual turn-key opener inside your glove compartment ensures you are never left wrestling with tin cans when hunger strikes.
Until then, remember that everyday household physics has your back. Pick your tool, take your time with steady pressure, and you will have dinner on the table in no time.